

And so the story goes.
Once upon a time, there was a mom surfing the net. She had no rhyme or reason she was just surfing. After a few clicks on a few random things, she came across the most stunning autumn craft she had ever seen…
She wanted to make them so she jumped in her van in search of wool roving… felt skein… or something like that…
She hurried back home to craft them that evening… excited from her find, perfect for the season…
Now, she didn’t think up the craft herself, or devise it either, she simply followed directions which made things so much easier…
She envisioned herself scattering them about… dangling them from branches, bestowing them to future daughter-in-laws… cool stuff like that.

She enjoyed glancing at them here, there and everywhere and thought others might, too.
So, with camera in one hand, acorns in the other, she captured photos to show them… one after another…
Before the clock struck midnight she finished snapping away…
… then downloaded the photos to her computer, uploaded them to her blog, finished typing the directions half written in her log.

She proofread and edited, and edited some more… and when somewhat satisfied she took a deep breath… hoping others would like them, too… clicked on her mouse and and sent the post through.
She slept happily ever after that night surrounded by bowls and trays of colorful wool acorns galore.
The End.
Well, not really the end, because you’ll need these directions if you decide to make them, too.
supplies:
wool roving
acorn caps*
hot glue gun & glue stick
bowl of hot water
two hands
If like Little Red Riding Hood you gather acorn caps from the forest, they may contain tiny critters that wiggle. So if you’re brave enough to do that, be sure to scrub them well and spray with a sealant. Or, you can do what I did and buy a small package of faux acorns at the craft store and ask your prince son to twist the caps off. Hobby Lobby and Michael’s had wool roving, but the JoAnn’s in my area did not.

You will need this stuff ↑, plus a glue gun if you don’t have one.

Cut a piece of roving, about the length of your palm, and separate.
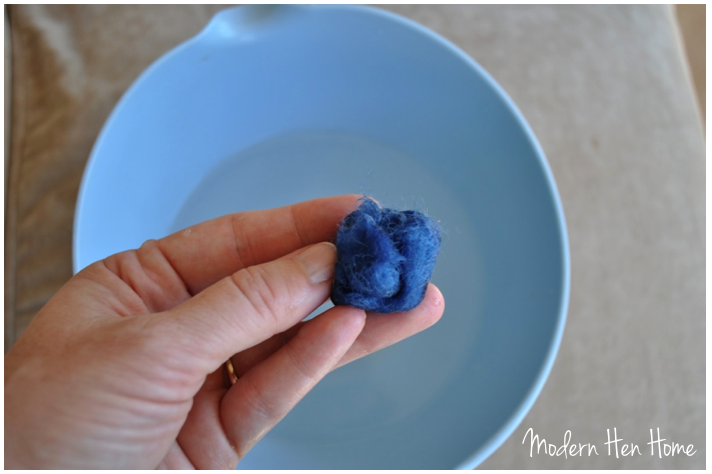
Dip in bowl of hot water and squeeze most of it out. Begin rolling between the palms of both hands in a circular motion.
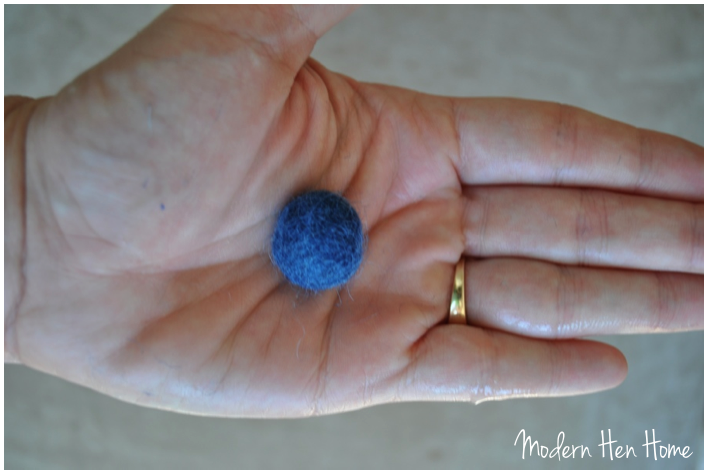
The wool will begin to tighten and form a ball. Add water if needed and keep rolling until ball is formed. This will take several minutes.
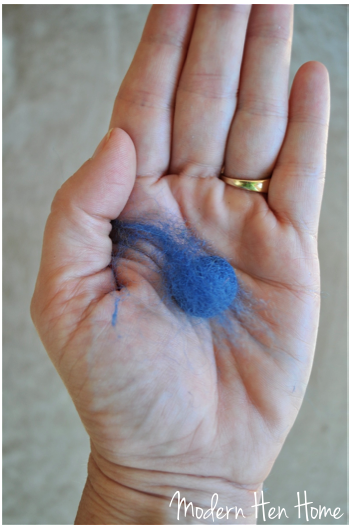 After the ball has tightened, check for cracks. Sometimes rolling longer will take care of them, but they’re easy to fix.

To repair, take a small piece of thin wool and lay it over the crack. Wet ball and roll until the extra piece merges. Dry for a few hours and hot glue the acorn cap.
To string your acorns, drill a tiny hole on each side of the cap and run string through then glue cap to the ball. Or, you can just glue completed acorns to the string.
Scatter them about and enjoy!

THE END…
Really!


Pingback: How-To Make Acorns From Batting {& Just When I Have It All Figured Out…} | Modern Hen home
Cute! I always think I will make some of these but I never take the time! Thanks for linking up at Friday’s Unfolded!
LikeLike
Thanks Jill! I appreciate you taking the time to stop by. I’ll check out your blog too! Have a blessed day!
LikeLike
These are so cute! I have never worked with wool like this before. Might need to try it out! Thanks for sharing at Fridays Unfolded 🙂
LikeLike
Thank you Denise! They were so easy and fun. I know you will enjoy! And I truly appreciate Fridays Unfolded. Many blessings!
LikeLike
Hey Lisa! Just popping in to let you know that I will be featuring this cute acorns on Fridays Unfolded this week! Thanks again for linking up 🙂
LikeLike
How exciting! Thank you Denise, I truly appreciate it! I will be sure to look for it and share on my FB page with readers. God bless!
LikeLike